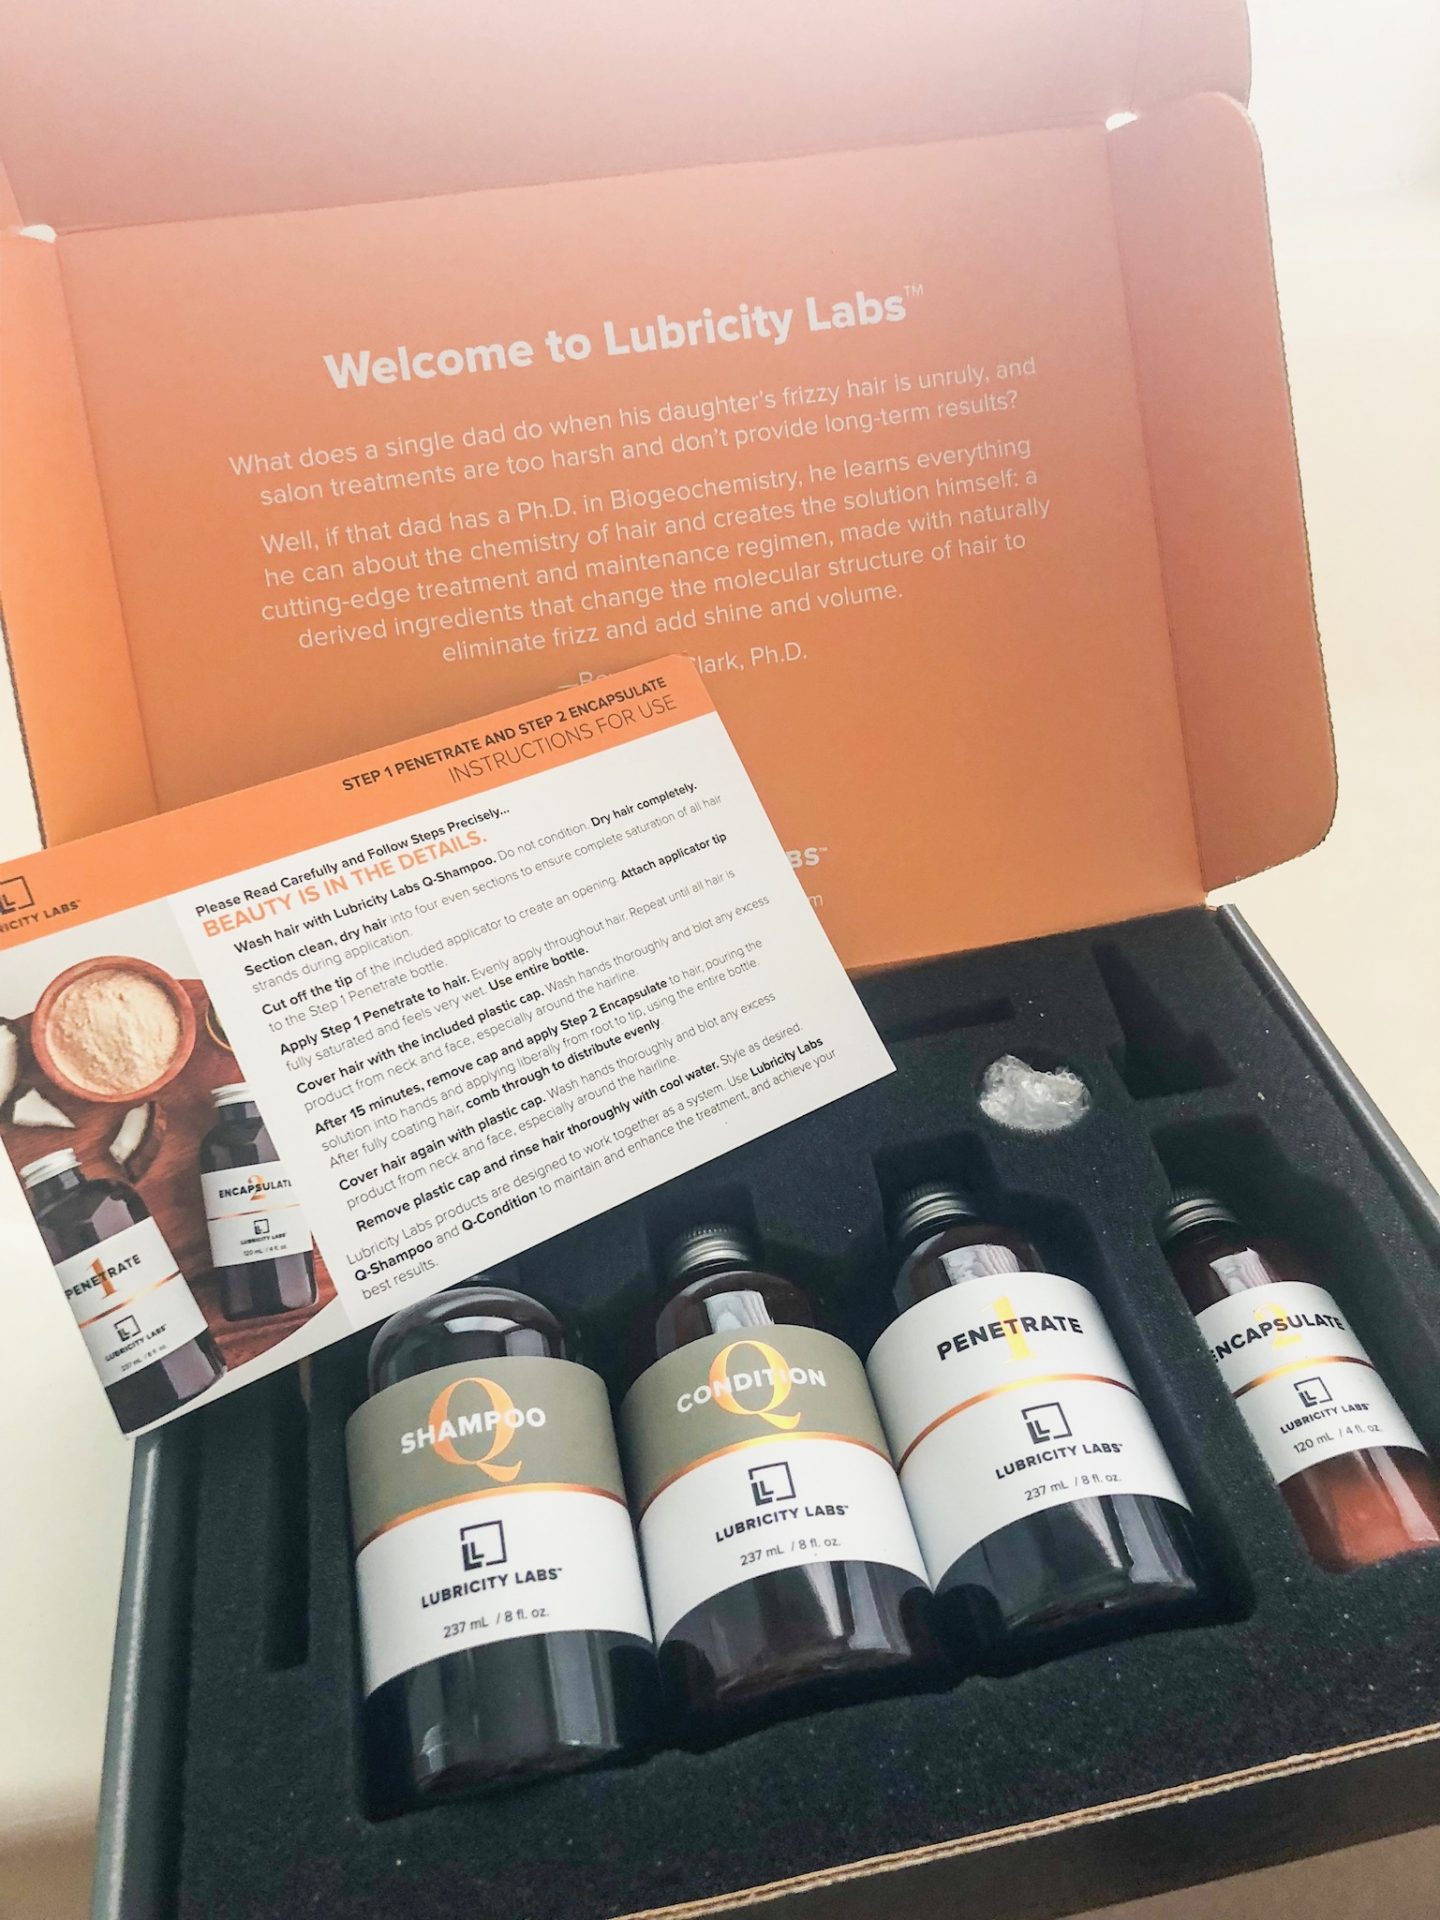
Hi guys! As long as I can remember I have always had unruly, frizzy hair. Anything from humidity to a tiny amount of mist or fog will anger it, not to mention being anywhere near a beach. Leaving for my travels soon I wanted a longer term solution other than a simple serum or spray because those don’t really last on me. And I’m not high maintenance so I was looking for a wash and go solution, I had thought about having a keratin treatment done because I’ve done it before and I liked the results… but the time, cost and chemicals made me think twice. Then I discovered the Lubricity Labs anti frizz treatment and thought I would give it a shot because I had nothing to loose! The directions are clear and easy to understand but, they must be followed to the T. It’s easy to do alone but having an extra pair of hands helps too. It is suggested to continue using the shampoo and contitioner in the kit, and according to the reviews, some even say their hair quality gets better as they use both on a regular basis after their treatment. I added a step by step with photos and the details on how the product feels, tips and tricks etc. Enjoy and let me know if you try this system!
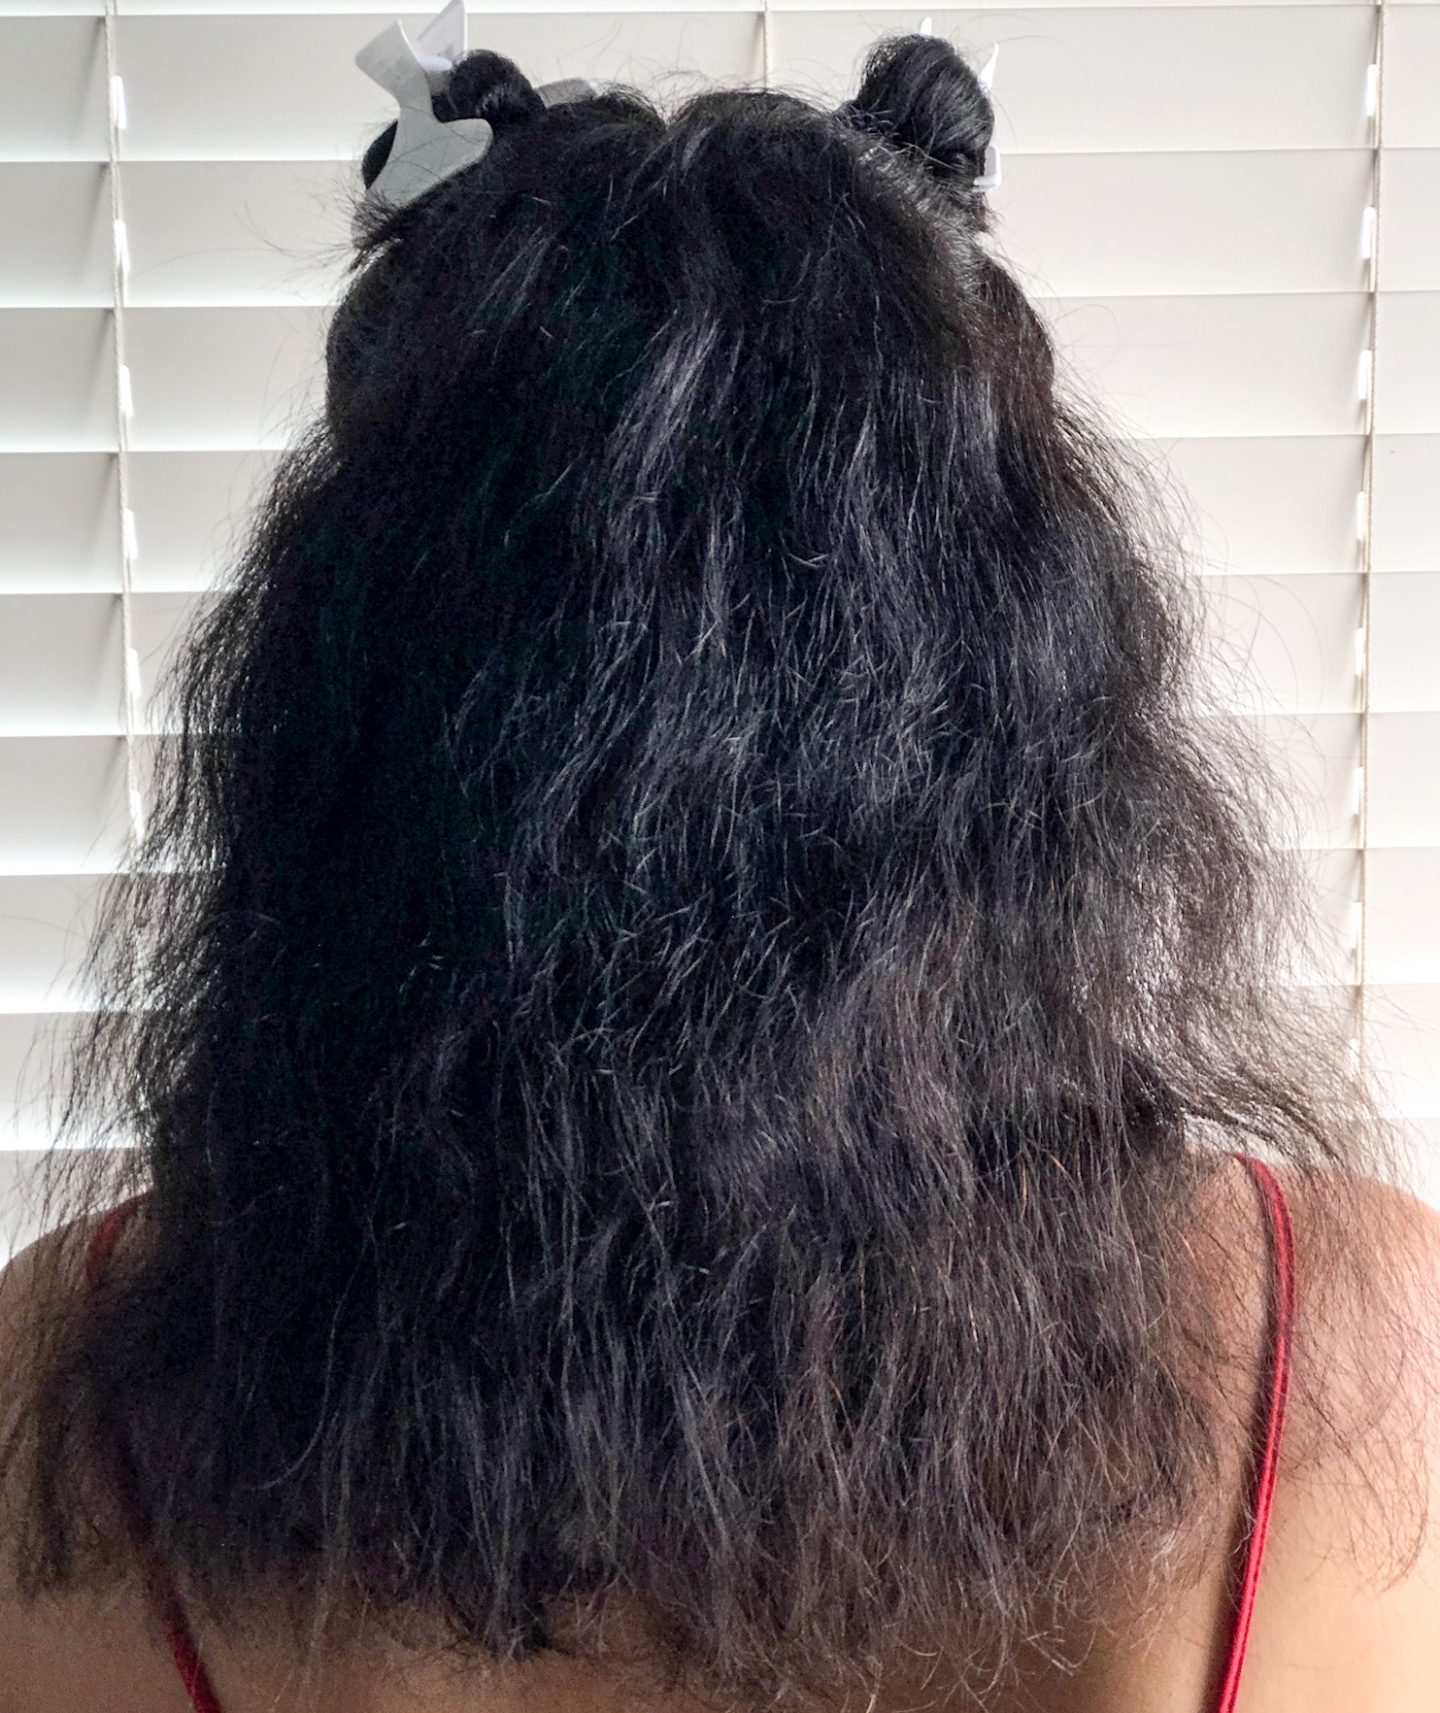
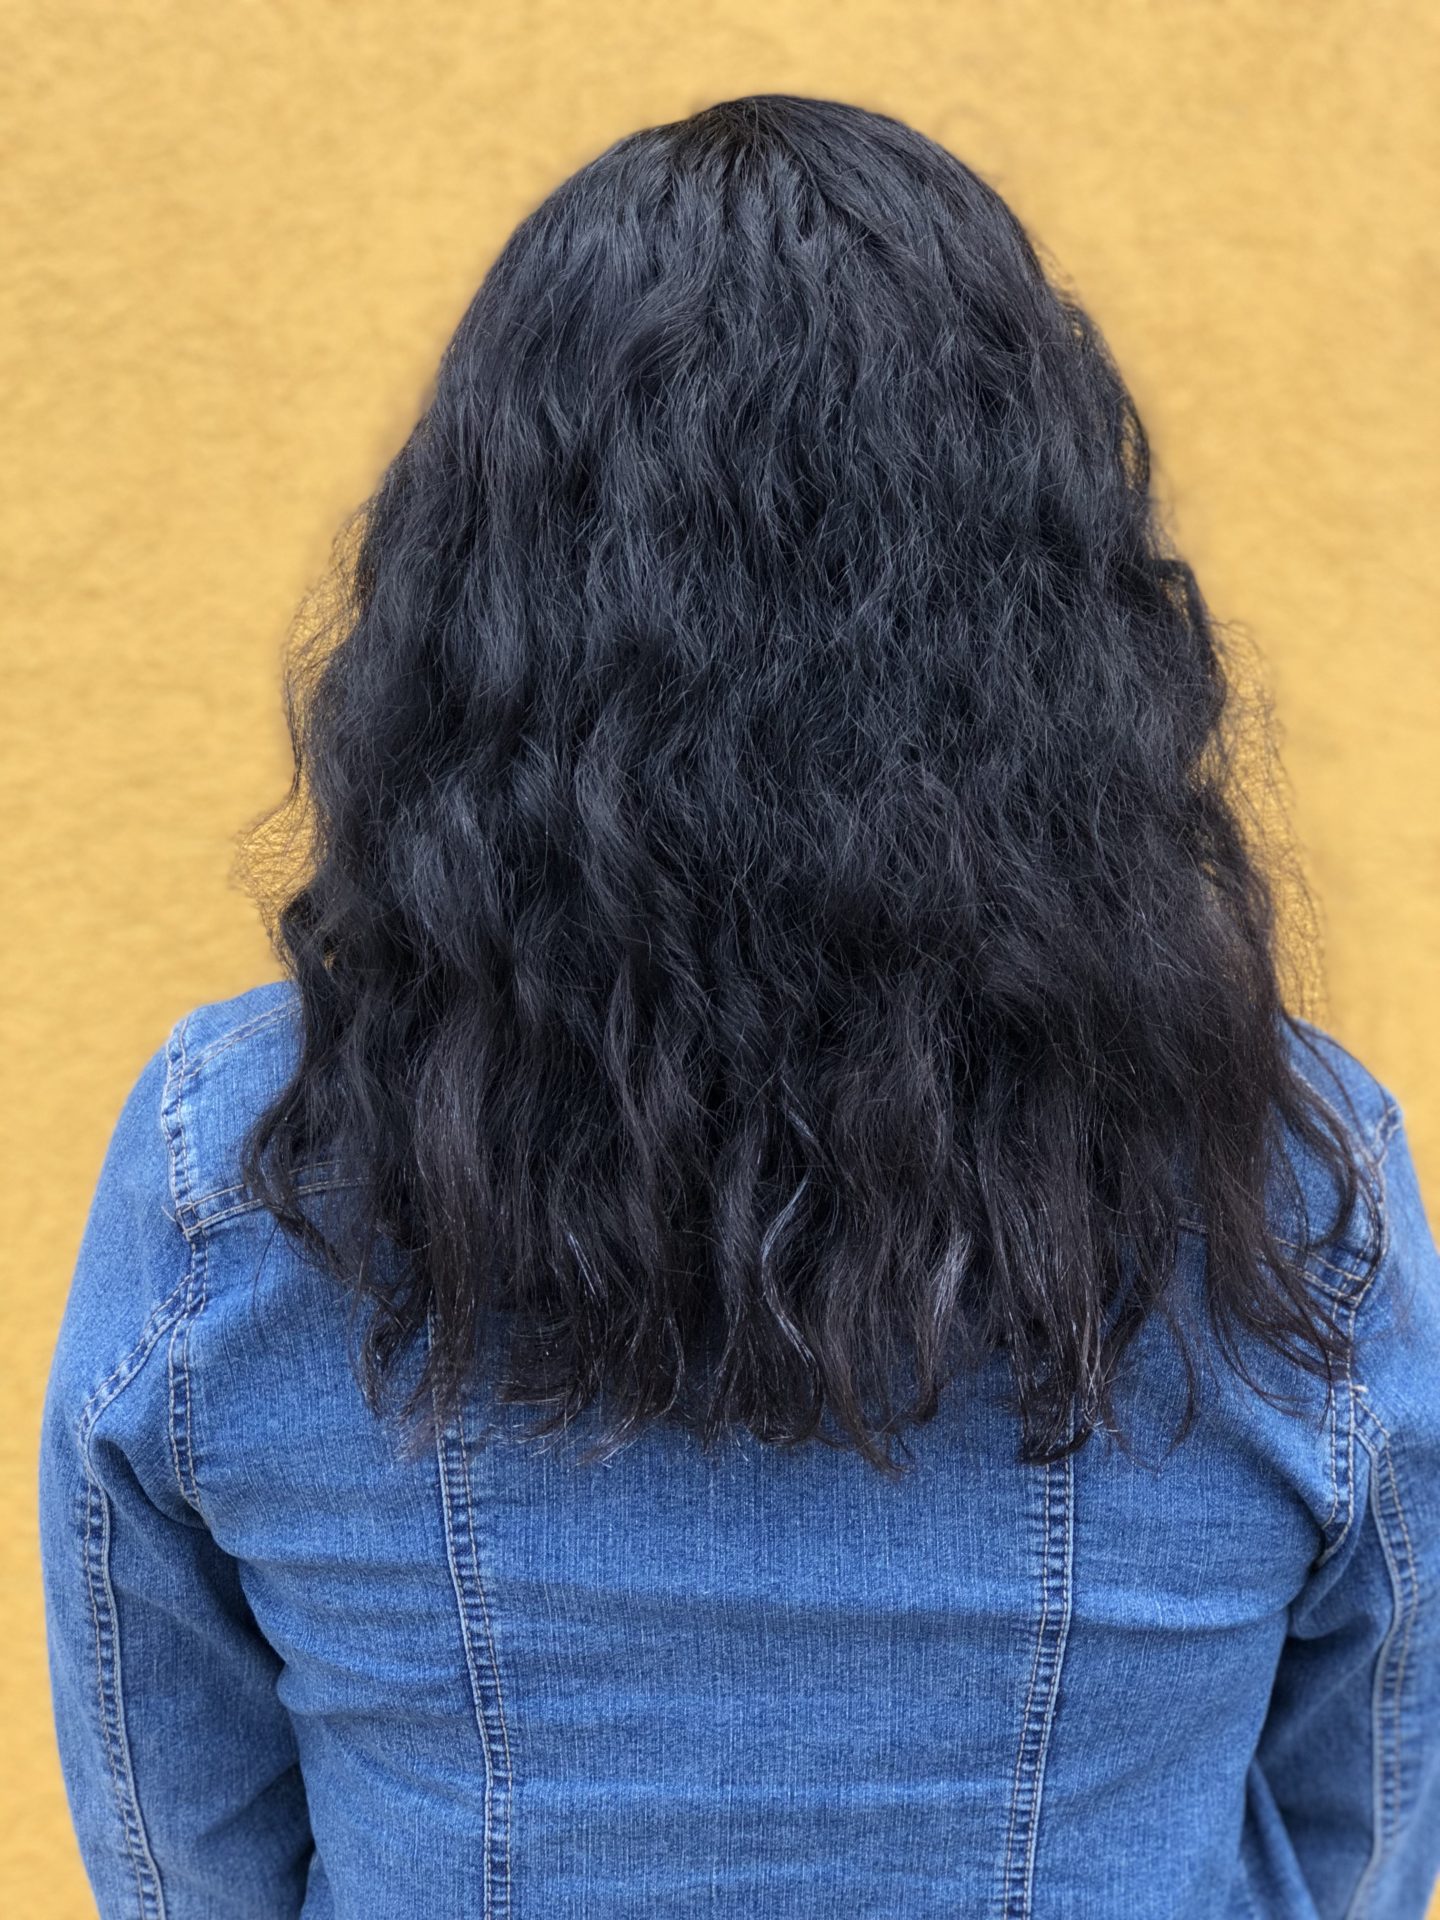
Here is my before, I have a lot of frizz underneath the top layer of my hair so when I part it in half it’s very visible. I’ve been doing quite a few things to regrow my hair so there is a lot of new short hair in that area. Step 1– I had already washed my hair with the Lubricity Labs Q-Shampoo and let my hair air dry.
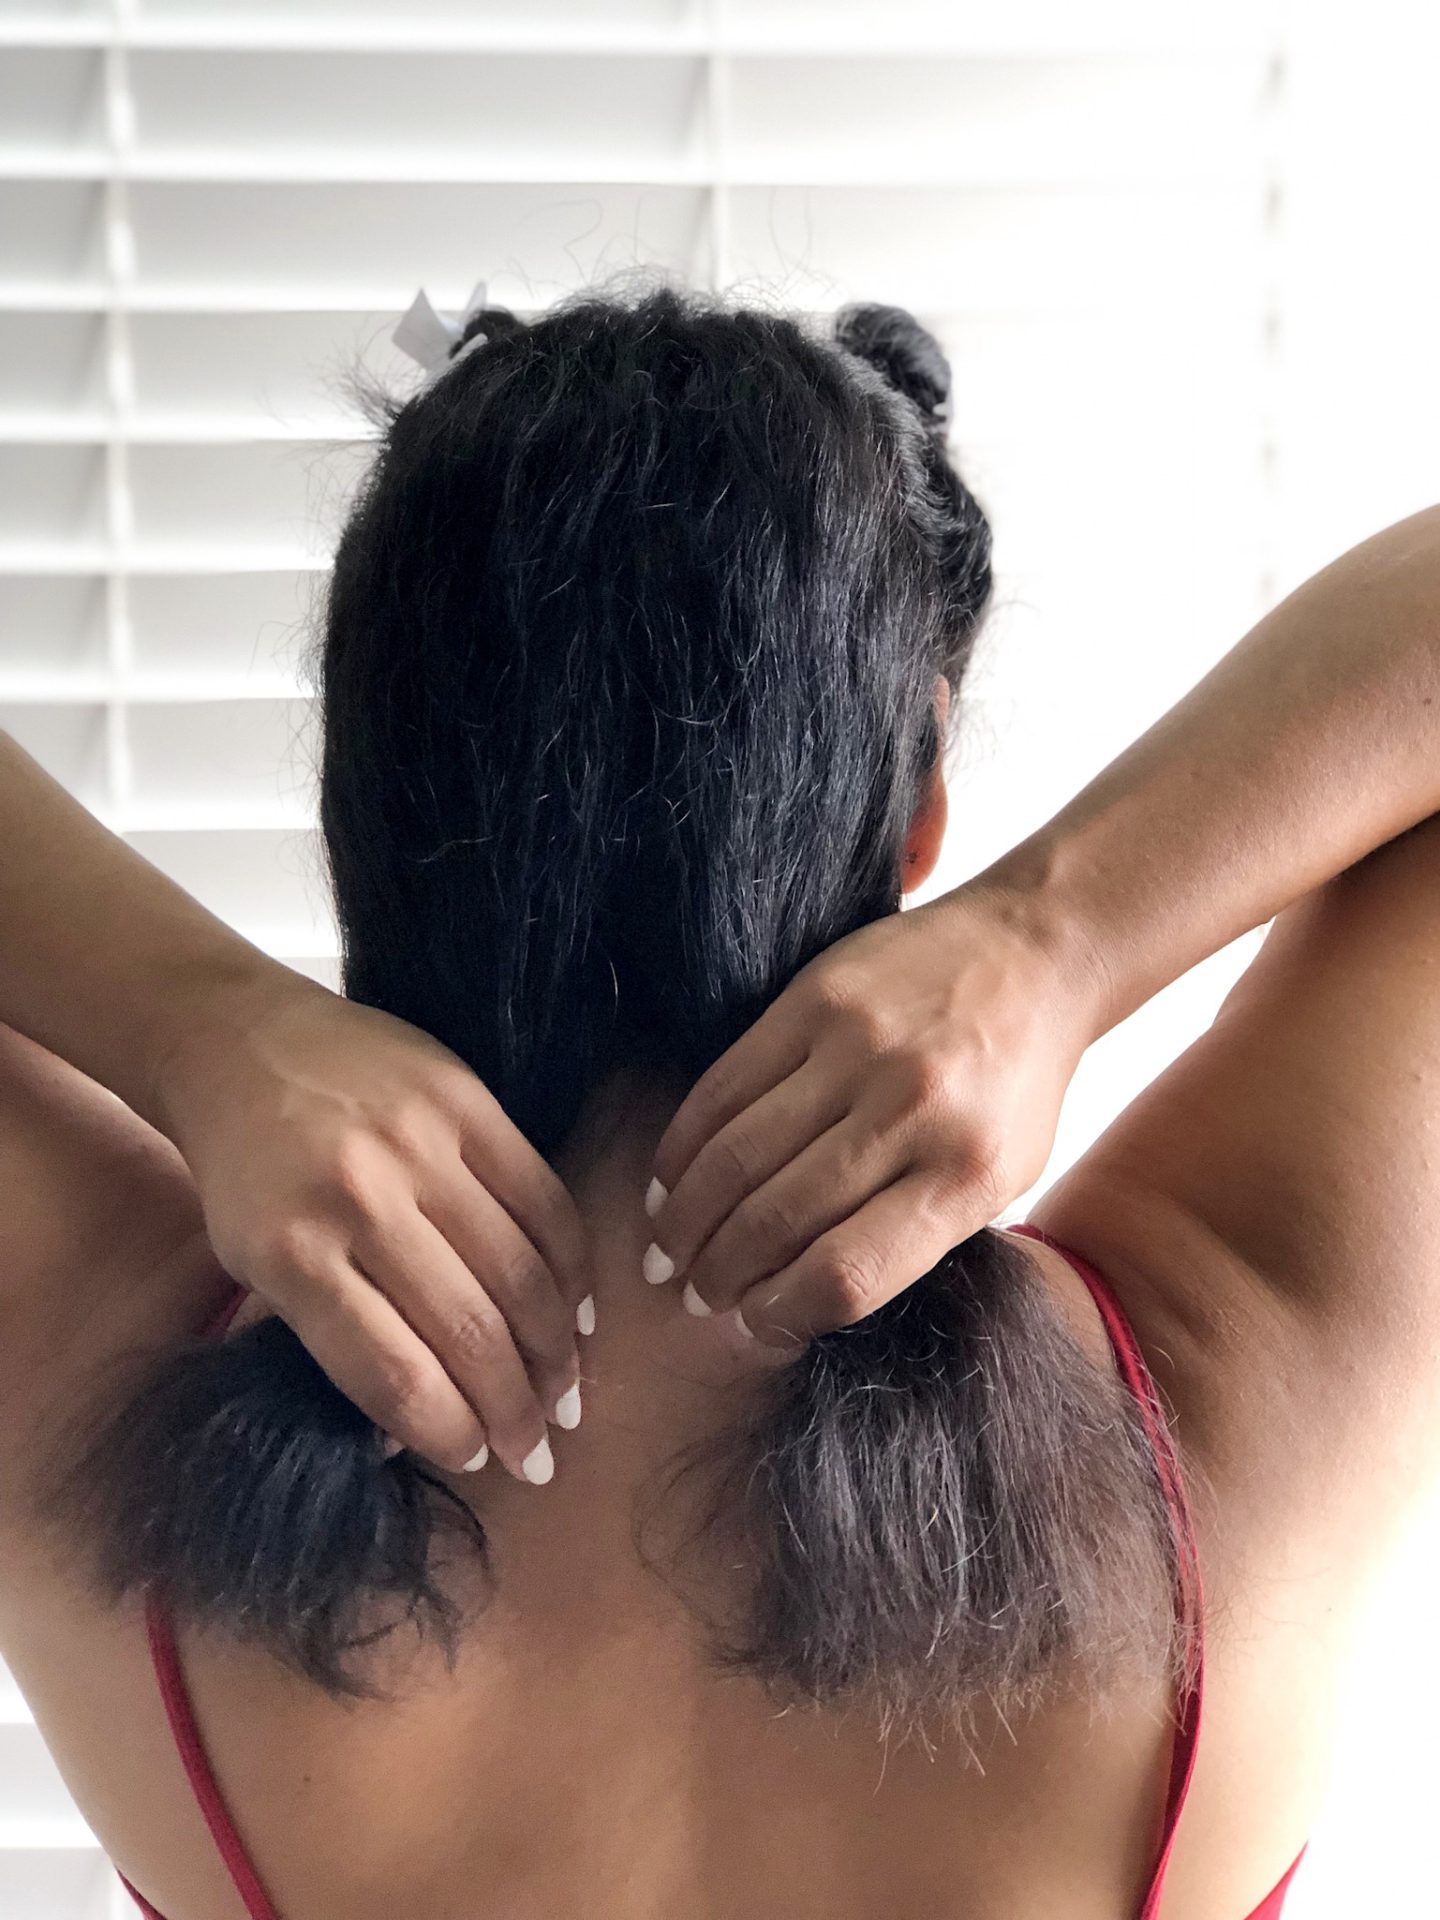
Step 2 – Section clean, dry hair into 4 equal sections, I added clips to the top two mini buns I created to hold then in place and started on the bottom.
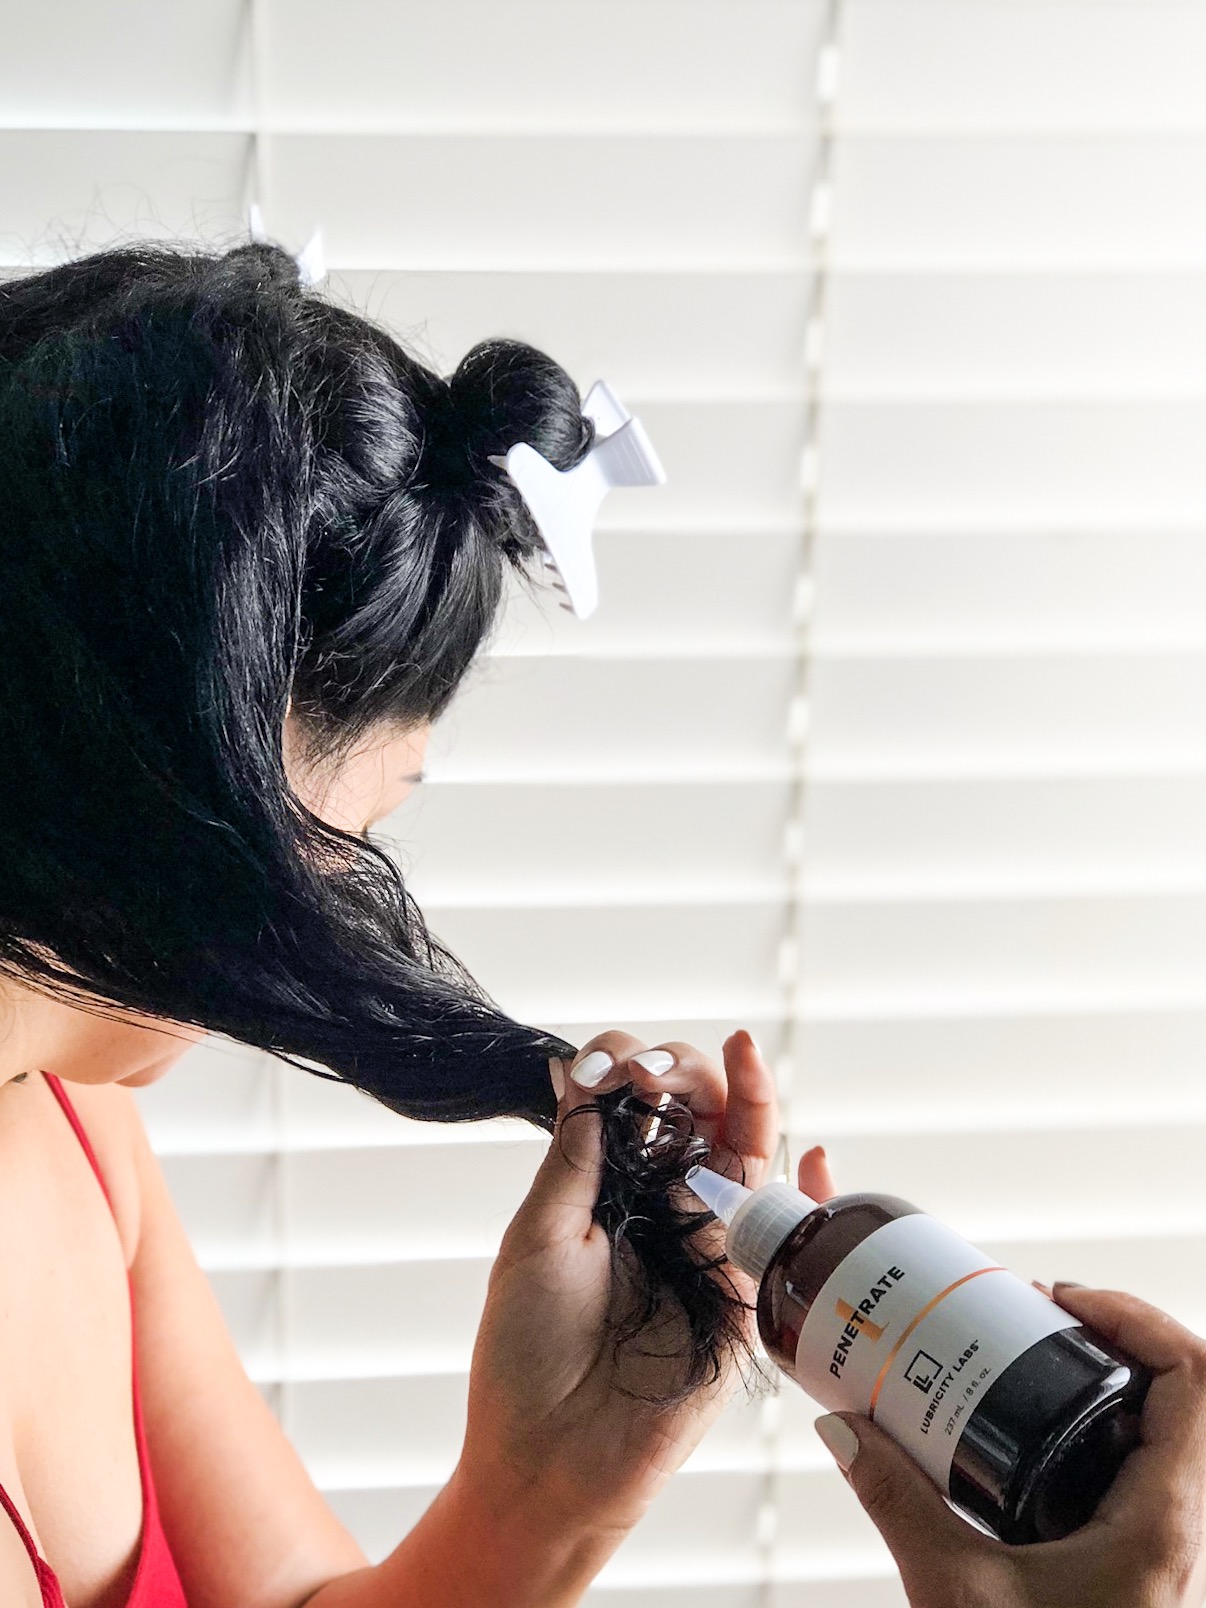
Step 3 – Add ENTIRE bottle of Penetrate to your hair. This is why you sectioned the hair into 4 sections so you can work in the product one section at a time. The consistency is liquid so be sure to protect your eyes.
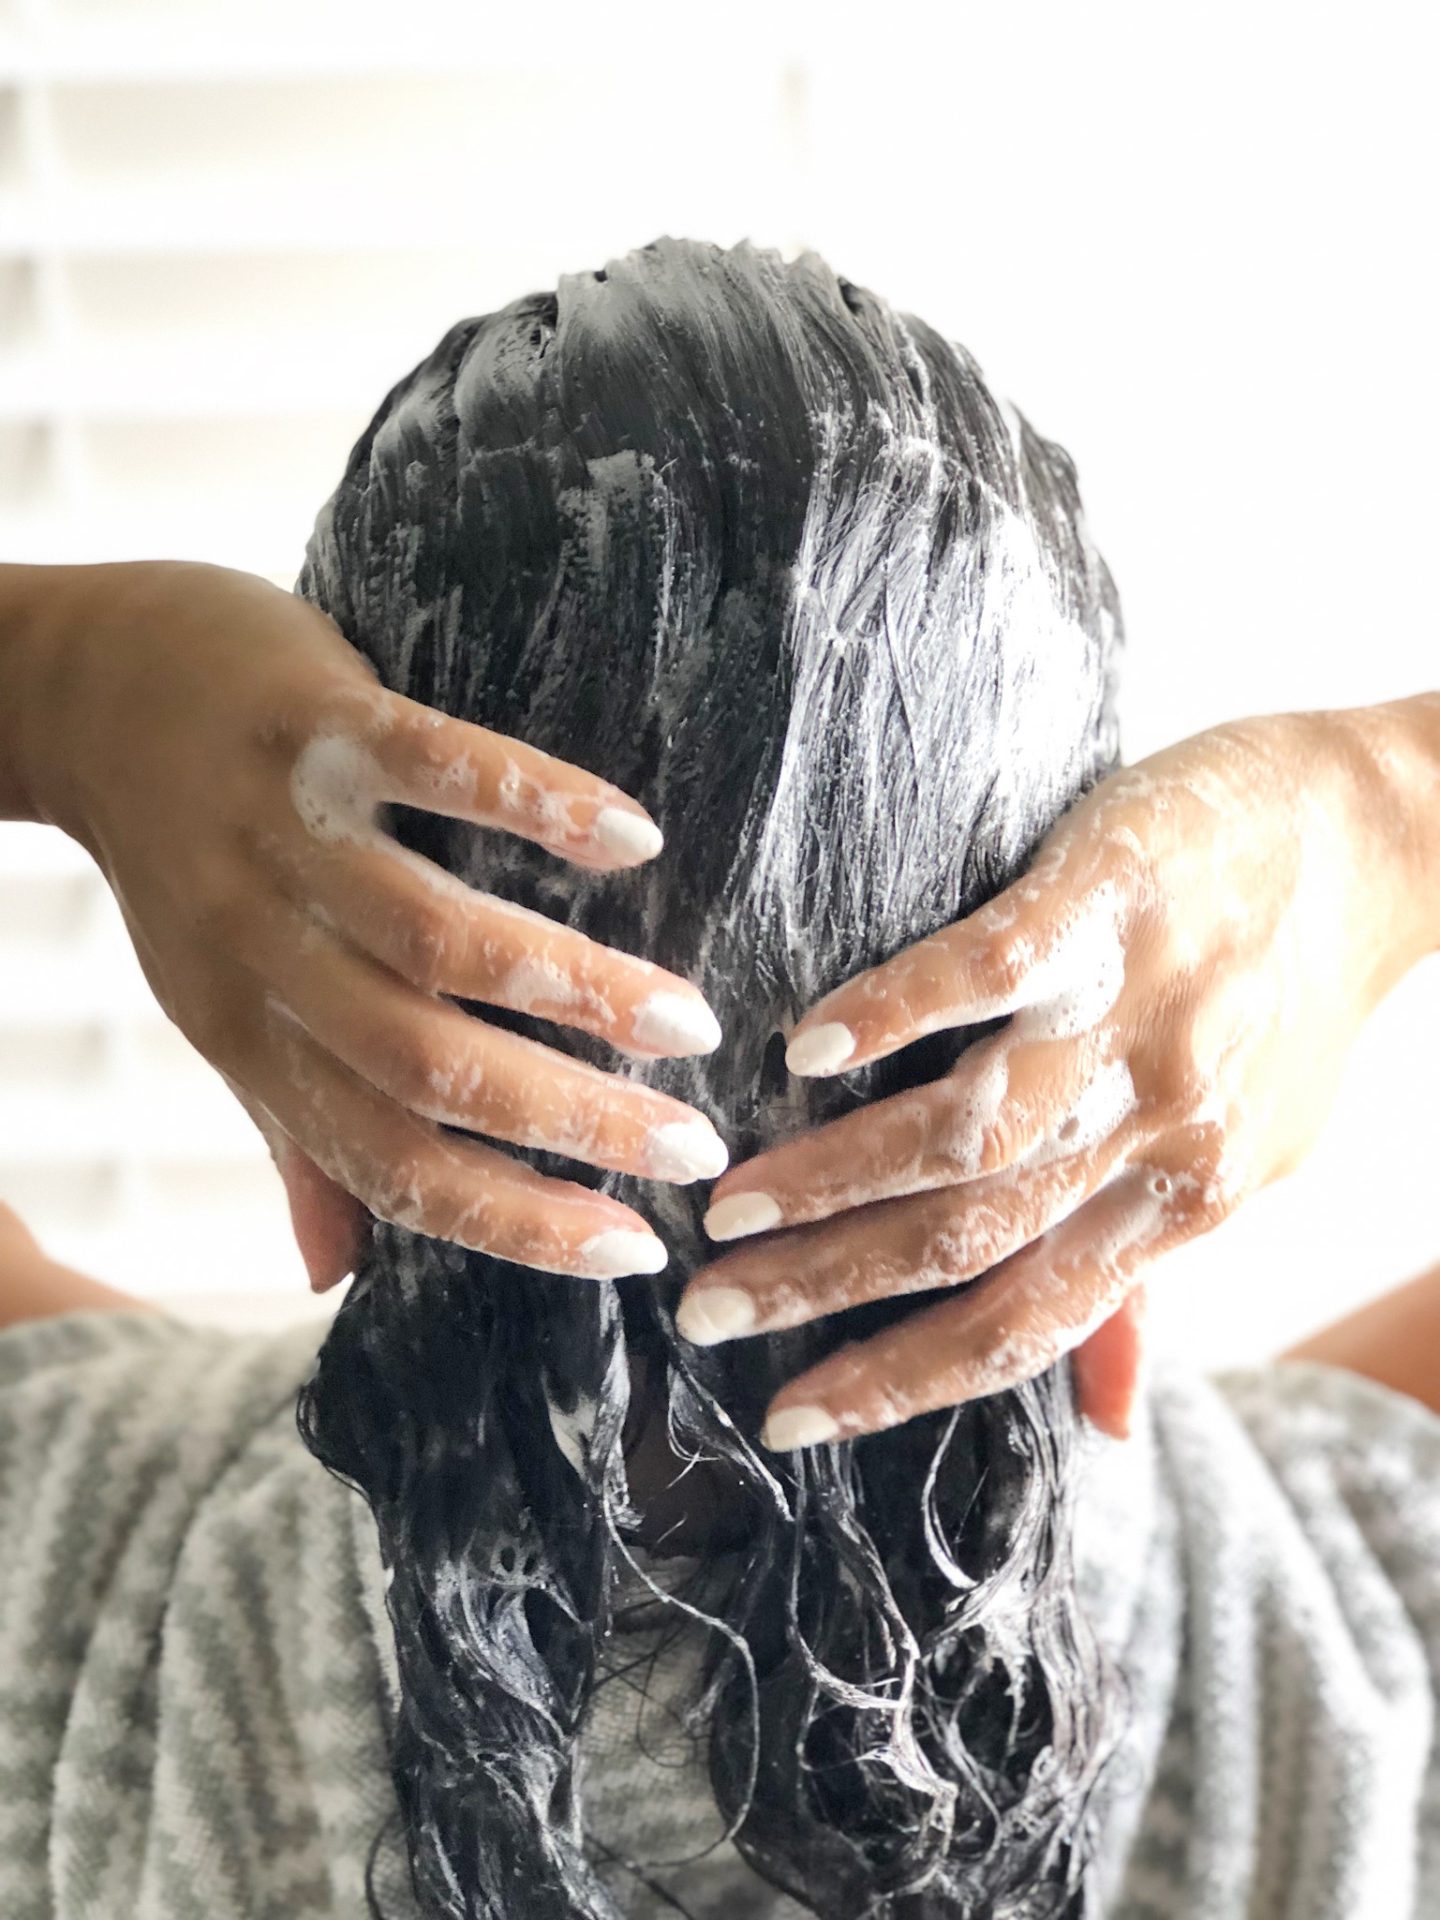
After I had covered my entire head, I guided all of my hair to the back of my head and poured out what was left in the bottle, it will seem like you have product left over but keep adding it in until you bottle is empty. As you can see, it suds like shampoo.
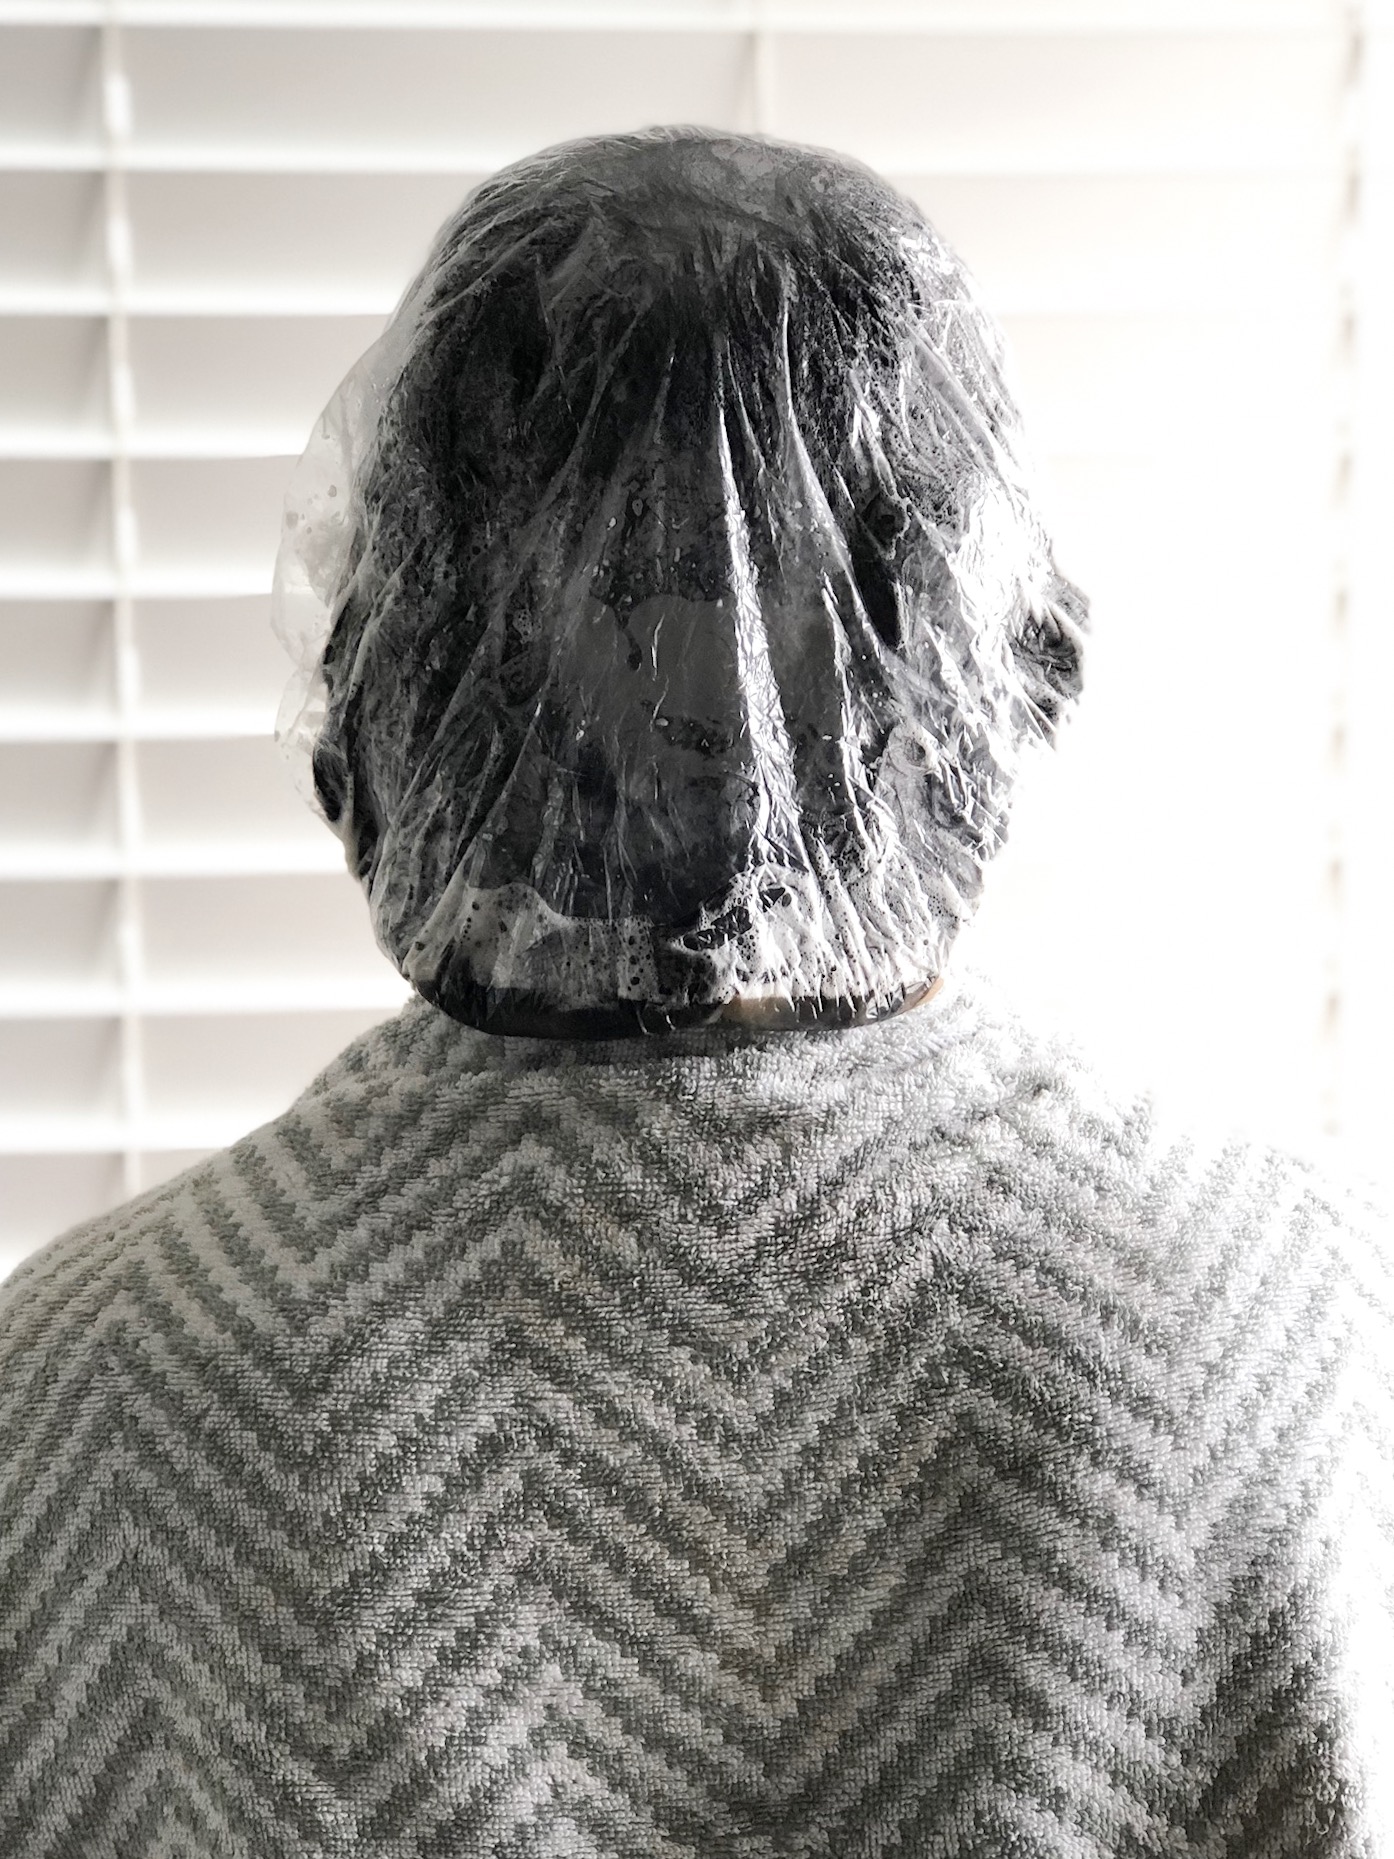
Step 4 – Cover your hair with included cap and set a timer for 15 minutes. The product was running into my eyes and face so I added cotton rounds around the perimeter of my face to absorb the dripping.
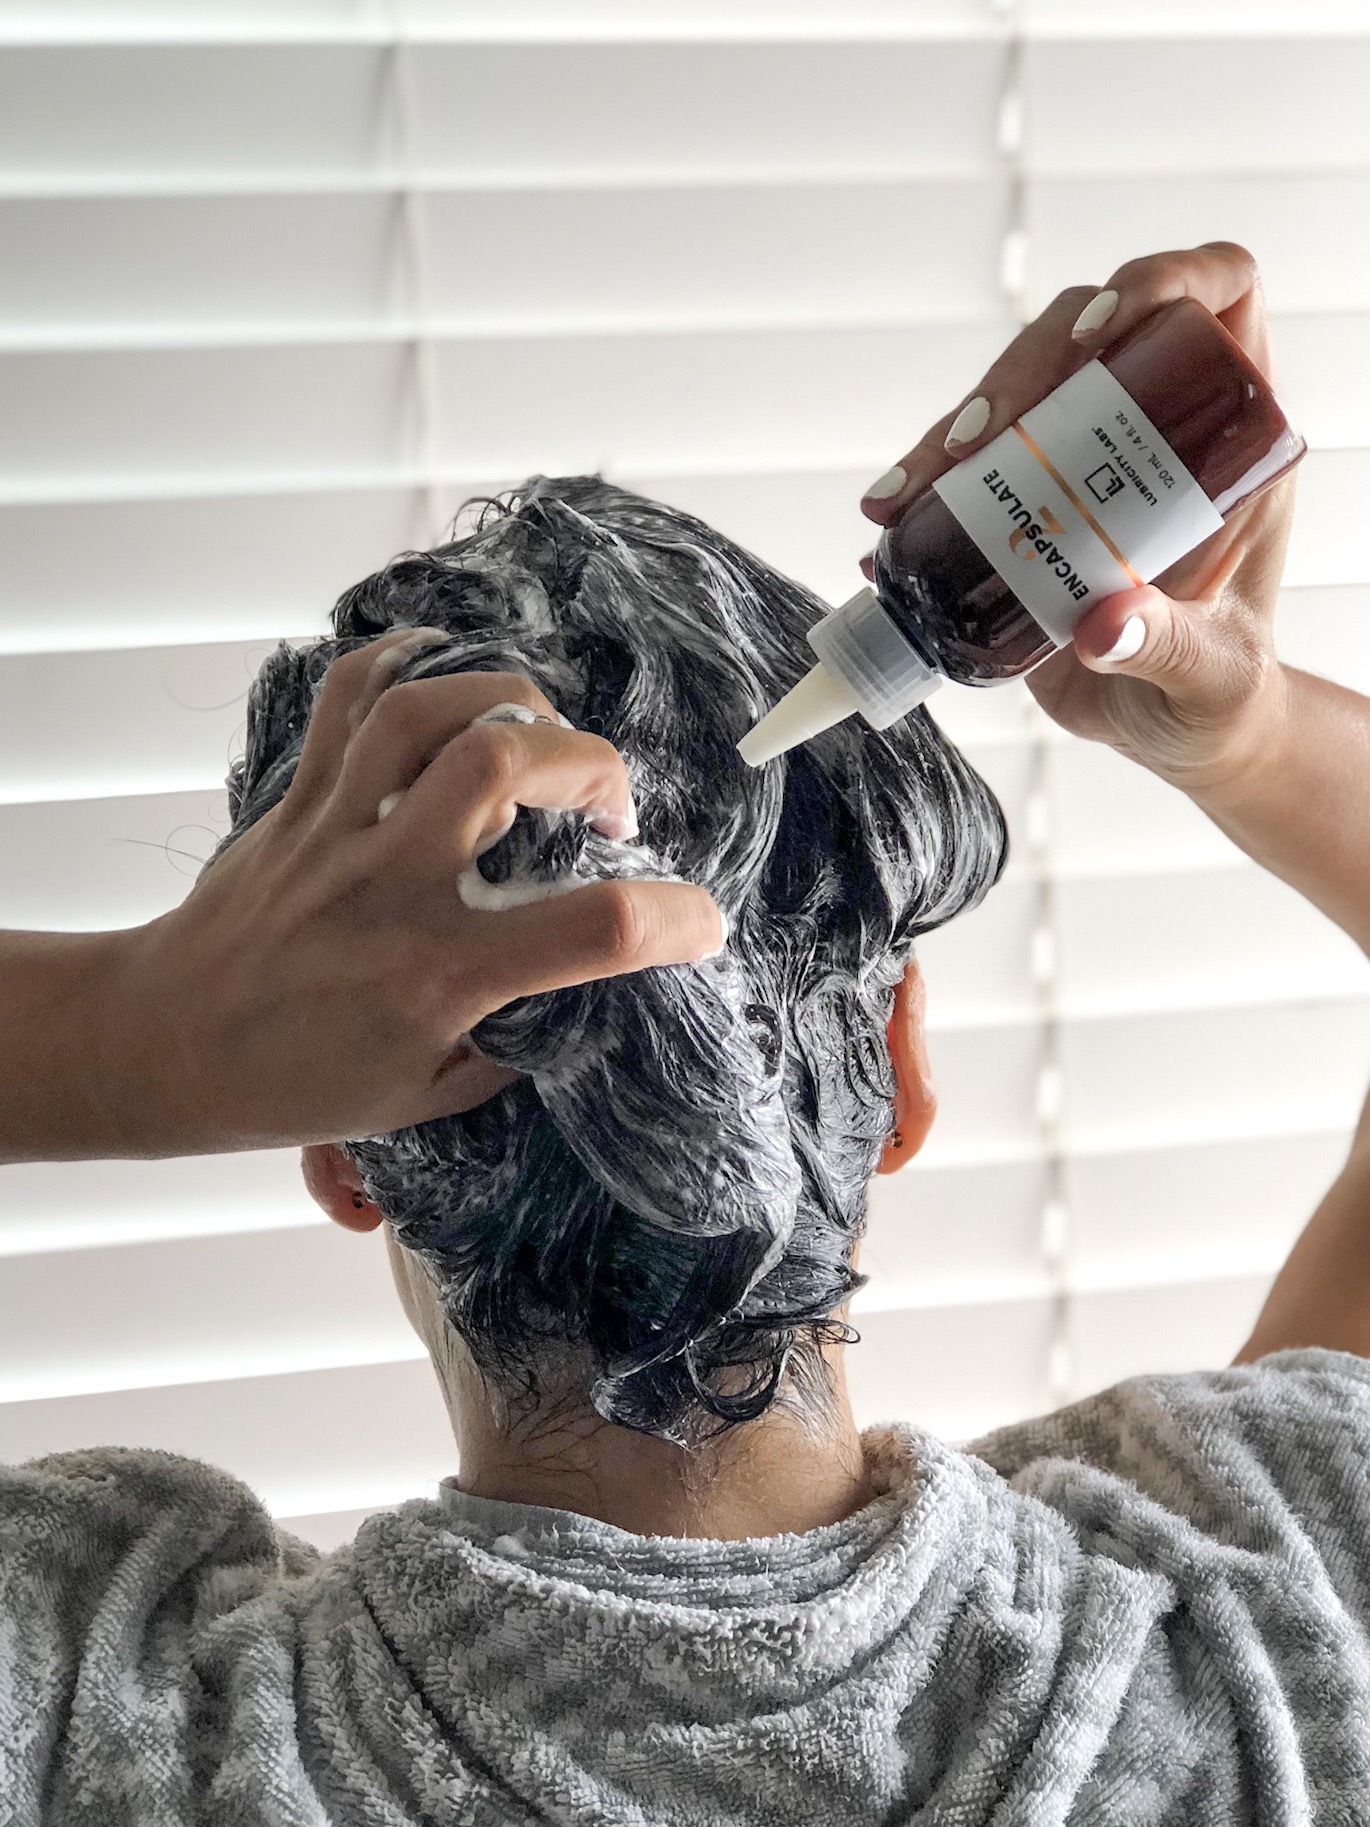
Step 5 – Remove the cap and add ENTIRE bottle of Encapsulate to you hair, do not rinse hair in between. The consistency on this product is like that of a creamy conditioner so it is easier to apply and will not run into your eyes and face.
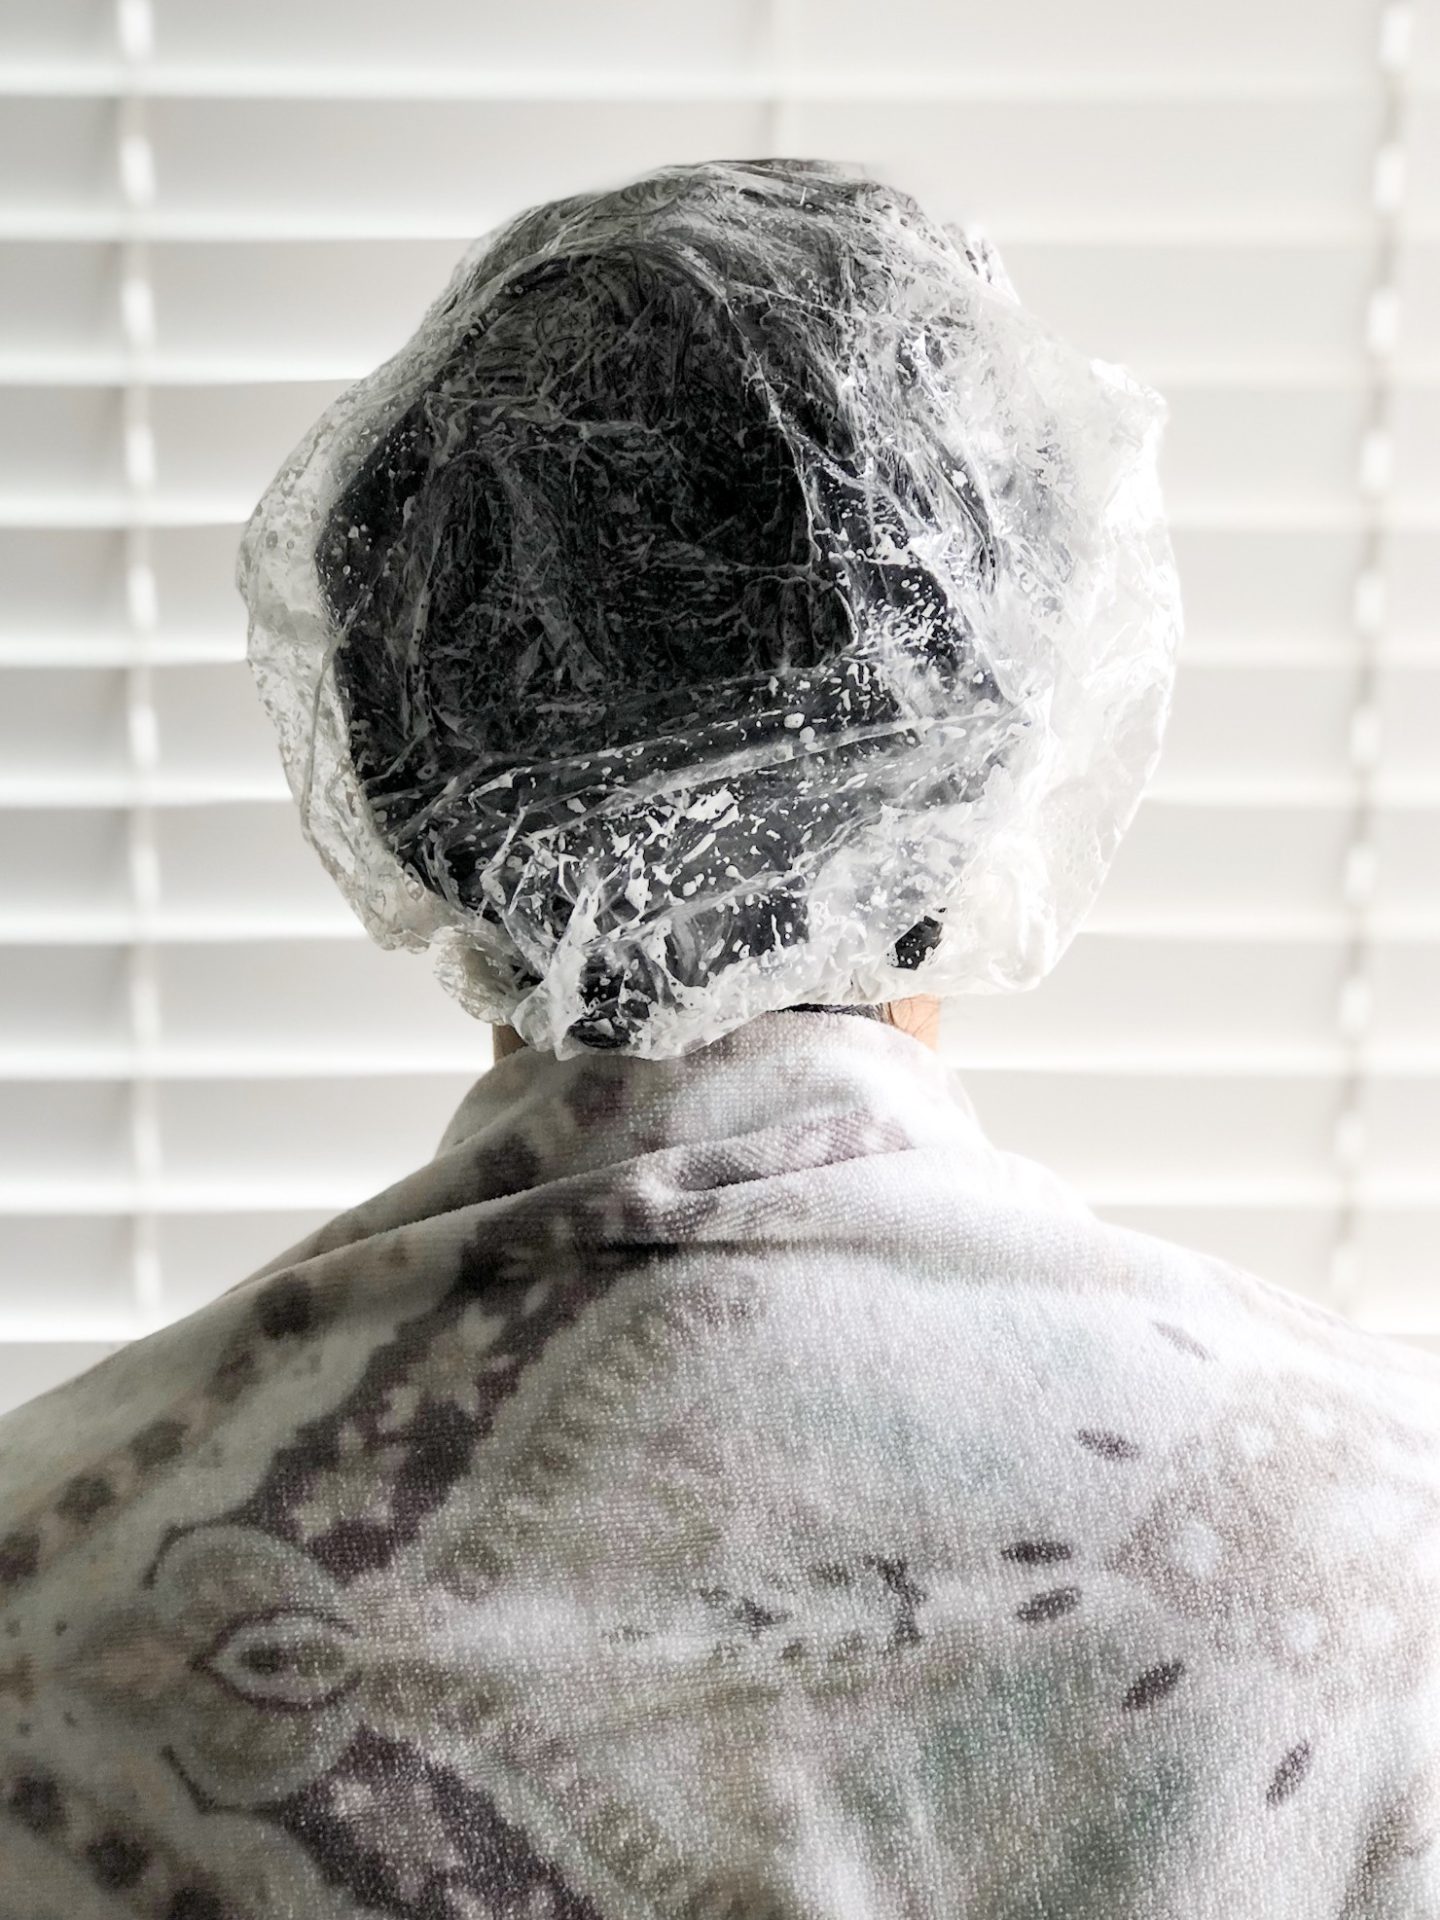
Step 6– Cover with cap for 15 minutes. Step 7 – Remove cap and rise hair with COOL water. This is where I should have done things a bit differently… my skin is very sensitive and I was afraid the treatment running down my skin would affect me somehow and so I asked my friend to rinse it outing the tub instead of just getting in the shower. DO NOT do what I did, just get in the shower and rise very well, your skin will be fine!
You can see how after I let my hair air dry there was still product left on my ends…see the white stuff? I had to rinse again to get it all out and then my hair felt heavy and gritty. Even with that going on, take a look at the hair quality, no crazy flyaways and my short new hair that is usually super obvious is blending into the rest of my hair!
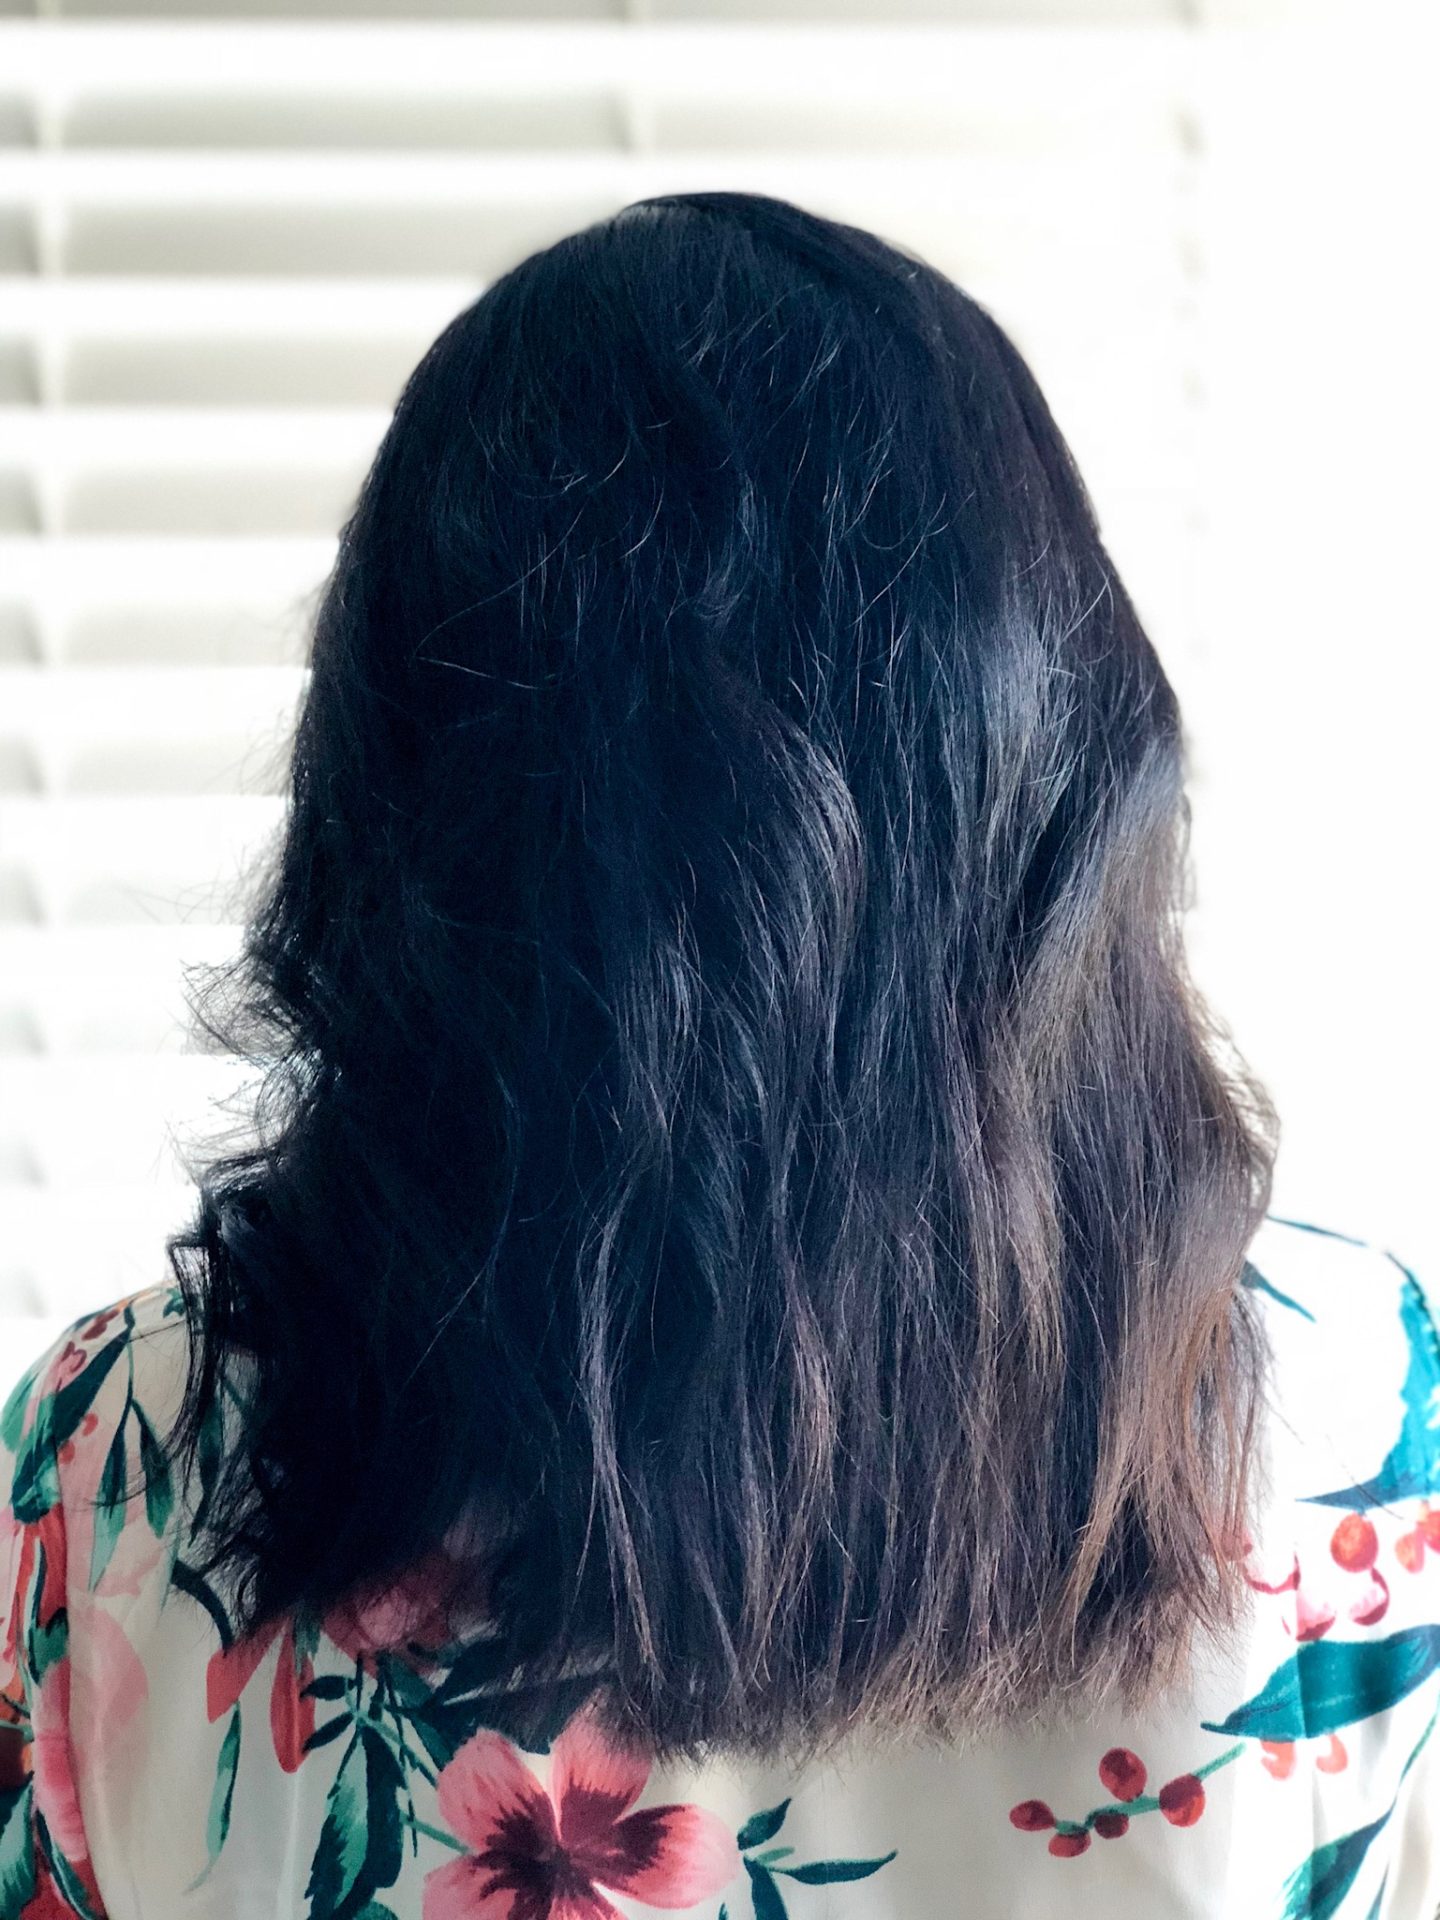
I also wanted you to see what my hair would look like after being heat styled, in this photo, it has ben blown dry and slightly waved with hot tools. It’s very tame!

I took photos the very next day and this was my look! I love how tame and amazing it looks! I’m leaving for Mexico today and now I’m not dreading how my hair will behave! Are you like me, does your hair rule your world? If so, the Lubricity Labs system might be for you!
Have a lovely day guys!
Beautiful photos and great review! I use Lubricity Labs and I’m so in love with it! <3
Thanks! Me too!
how long does it last for you?